

This post contains affiliates. Click here to read my affiliate policy.
If you’re ever at a loss for what to wear, check out my personal mantra: WWJLD. It stands for What Would Jenna Lyons Do. You don’t know how many times I’ve turned to this for help with I-don’t-know-what-to-wear days and why-doesn’t-this-look-right moments.
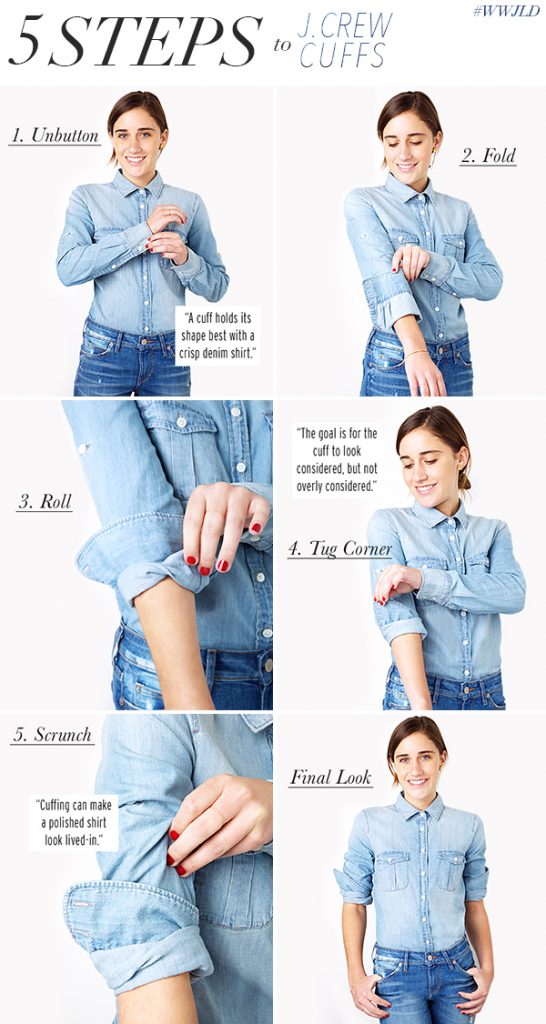
I know, I know, Jenna Lyons is so in style right now. It’s hard to capture that Jenna Lyons babeness, but thanks to this shirt cuff tutorial by Who What Wear, I’ll be one step closer. And, what do you know? I was wearing a J.Crew shirt when I saw this guide.
I was a little skeptical about this tutorial, but it actually worked! I think the trick is in the last two steps. Tugging on the sleeve and then scrunching at the end gives that slightly unkempt feel that contrasts with the polished look of a collared shirt.
To get the the perfect J Crew Cuff, follow these steps.
1. Unbutton the shirt sleeve, fold it up to cover the elbow, then re-button it.
2. Roll up the cuff and fold it in half, making sure that the seam is on top of your arm.
3. Roll up the sleeve one more time, starting from the cuff and pulling the outside down to make it look like it is sticking out.
4. To achieve that scrunched look, push the sleeve up the arm so the cuff sits comfortable right above the elbow.
